How can I configure line keys for a Yealink expansion module?
This guide outlines two methods for configuring line keys for a Yealink expansion module within the Yay.com platform: using the provisioning tab within a user’s settings, or by employing the use of config lines which are then applied to the hardware device itself.
For either method, it is already assumed that the device has been set up and configured within the Yay.com portal for auto provisioning.
Method 1: Using the Provisioning Tab
This method is generally recommended for its user-friendliness and reduced margin for error.
1. Log in to the Yay.com portal and navigate to Voice > Config > Hardware.
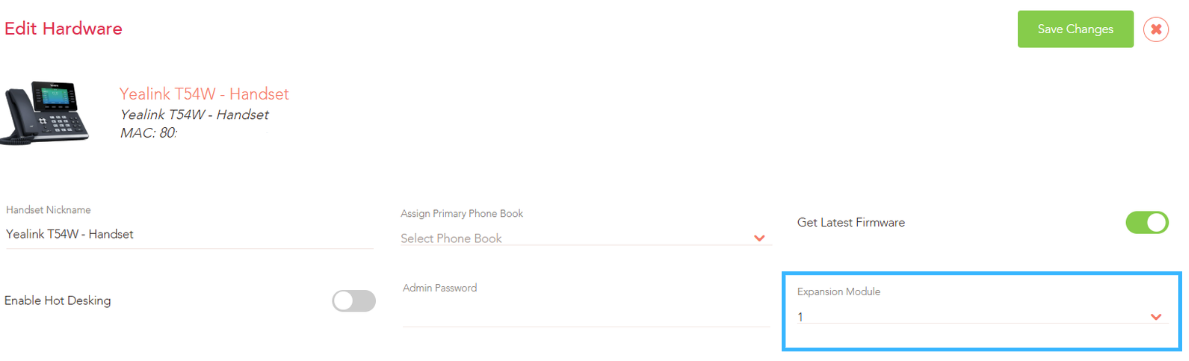
2. Edit the device that will be using the expansion module and look for the Expansion Module drop down menu, set this to the required value, and hit Save Changes.
3. Now navigate to the user’s Provisioning tab: Voice > Users > Edit User > Provisioning.
Due to the previous step, there will now be two (or more) buttons: Primary Keys and Expansion Module ‘X’. The former being the line keys on the device itself and the latter the keys for the expansion module.
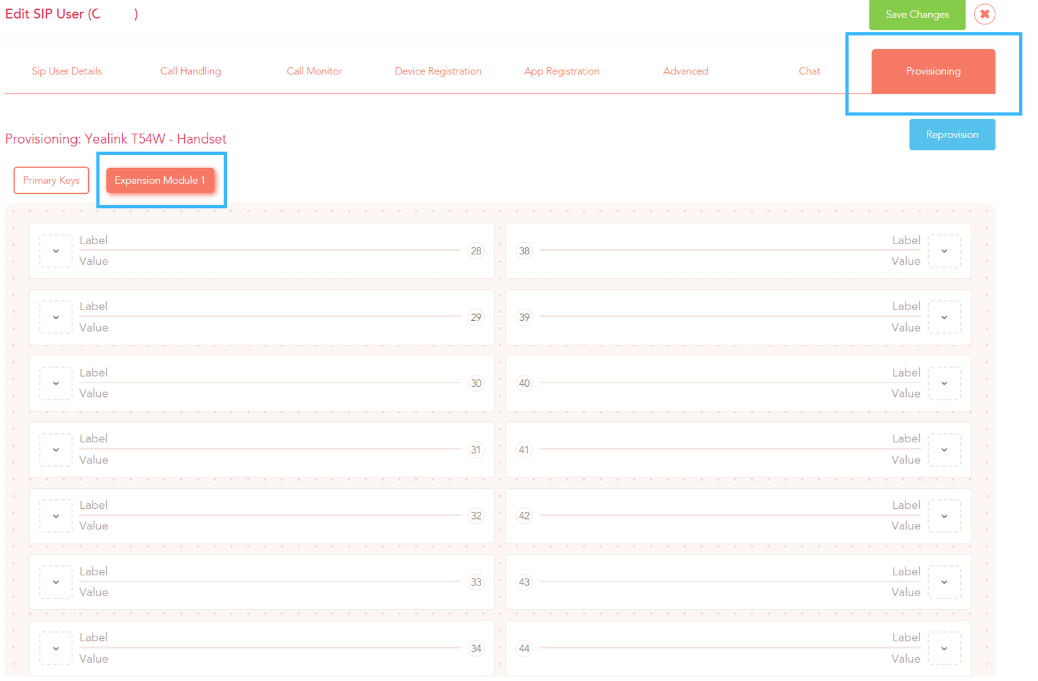
4. With the Expansion Module ‘X’ option selected, fill out the required line keys with a Button Type, Label & Value.
5. Once all the necessary line keys have been configured, hit the Save button at the bottom of the page first, followed by the Save Changes button at the top of the page.
6. The line keys should then update almost immediately.
Note: Updating line keys in bulk/for multiple users works in the same way for expansion modules as it does for standard line keys.
Method 2: Using Config Lines
This method offers more granular control but usually requires a deeper understanding of Yealink's configuration syntax. It can be used for advanced scenarios or when the provisioning tab doesn't offer the desired flexibility.
Note: For this method the device(s) should not have any Expansion Module value selected contrary to step 2 of the previous method.
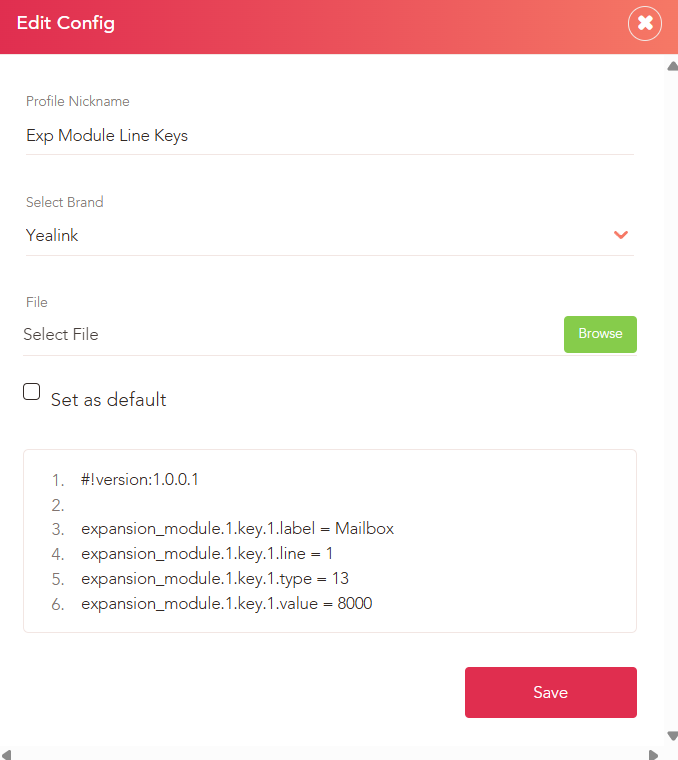
1. Navigate to Voice > Config > Hardware > Advanced Config. Here you can create a new config file or edit an existing one to add the config lines to.
2. If creating these lines from fresh, copy the below lines into the config file and edit the Type, Label & Value lines as required. Common line key types are as follows: 16 - BLF, 13 - Speed Dial, 11 - DTMF, & 10 - Call Park
a) Copy and paste these four lines as many times as needed to match the desired amount of lines keys.
b) The key.x portion of each line should be changed to the respective line key that it applies to (e.g. key.2 for line key 2, key.3 for line key 3 of the expansion module):
- expansion_module.1.key.1.label = Mailbox
- expansion_module.1.key.1.line = 1
- expansion_module.1.key.1.type = 13
- expansion_module.1.key.1.value = 8000
3. If using pre-existing config lines then these can just be copied in without change.
4. Once all edits are made, hit the Save button and apply the config file to the device within the Hardware section (if it is not already applied).
5. The line keys should then update after the next provision request, this can be expedited by performing a reboot of the device.
If you need any further help today, please don't hesitate to contact our friendly Support team on 0330 122 6000 or by email at help@yay.com!