How do I set up a Snom IP phone?
In order to set up a Snom IP phone, the first thing you will need to do is find the IP address of your Snom device. You can do this in a couple of ways:
Your Snom's IP address is shown on the display when starting up the device or you can press the Configuration Button (screwdriver or gear wheel symbol) >Information > System Info/Information. These instructions can vary slightly depending on the model of Snom.
You can also use a network scanning utility that will scan your network and list all the devices and their IP's available for you to use.
Once you have found your Snom's IP, open a browser window and enter the IP address into your URL bar.
Note: By default, the Web User Interface has no username and password set. If you are asked for this, it means that your Snom phone has already been configured otherwise.

When logged in to the web interface for the phone, if you have the message 'HTTP Password not set!' then currently no admin username or password has been set.
You can either click on the message or head to the QoS/Security tab to update this. Both of the sections highlighted below will need to be populated to set the username and password:


In this example, admin was used for the username and password fields.
If your device has already been configured with details then please enter them to log in. If you are unsure what these details are you can try admin or 456 as these are commonly used. Failing this, a reset of the device would allow you to gain access following the steps previously mentioned above.
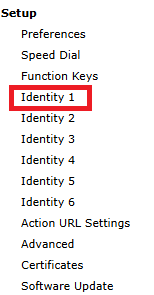
Once you are logged into the Web User Interface for your Snom, click the Identity 1 option under the Setup heading on the left-hand side of the page:
After which you'll reach the below page where there are a few fields that will need filling in:
In the Display name field, enter any name you wish.
In the Account field, enter your SIP Username.
In the Password field, enter your SIP Password.
In the Registrar field, enter the SIP Server, this is always talk.yay.com.
In the Authentication Username field, enter your SIP Username again.
To get these details log in to your Yay portal, navigate to Dashboard > Voice > Users > Edit (pencil icon) > SIP User Details.
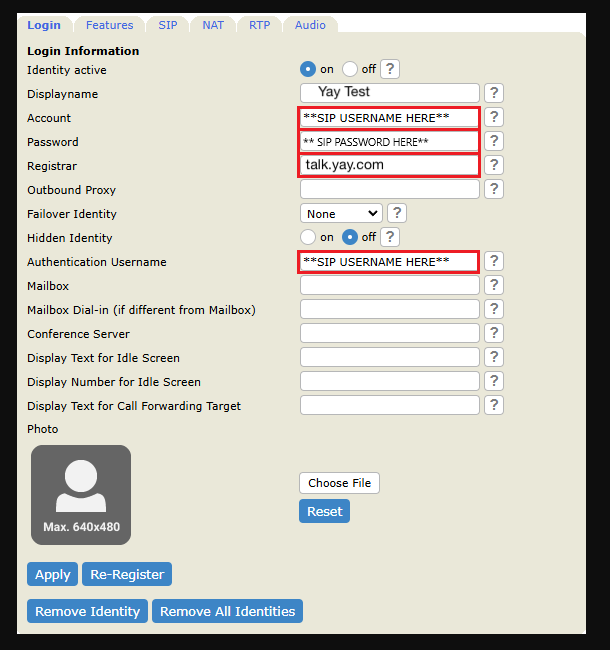
Once you have entered the information above hit Apply then Save on the pop up that appears.
After this the device will be registered however there is one final step you will need to do in order to make and receive calls!
You will have to turn off RTP Encryption as this is turned on by default for Snom devices.
To do this, just click the RTP tab at the top of the same page and you'll get the following screen:
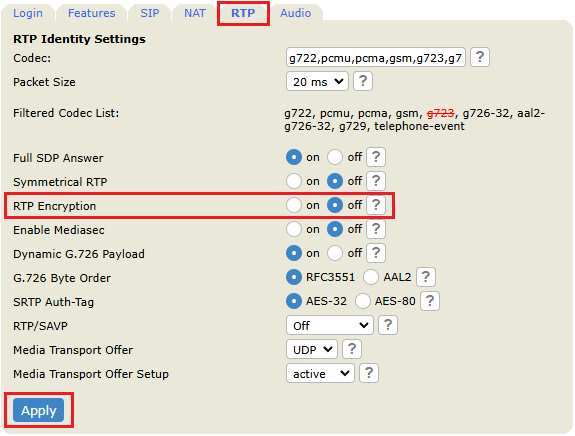
The RTP Encryption option needs to be set to Off, then hit Apply and Save on the pop up that appears near the top of the page.
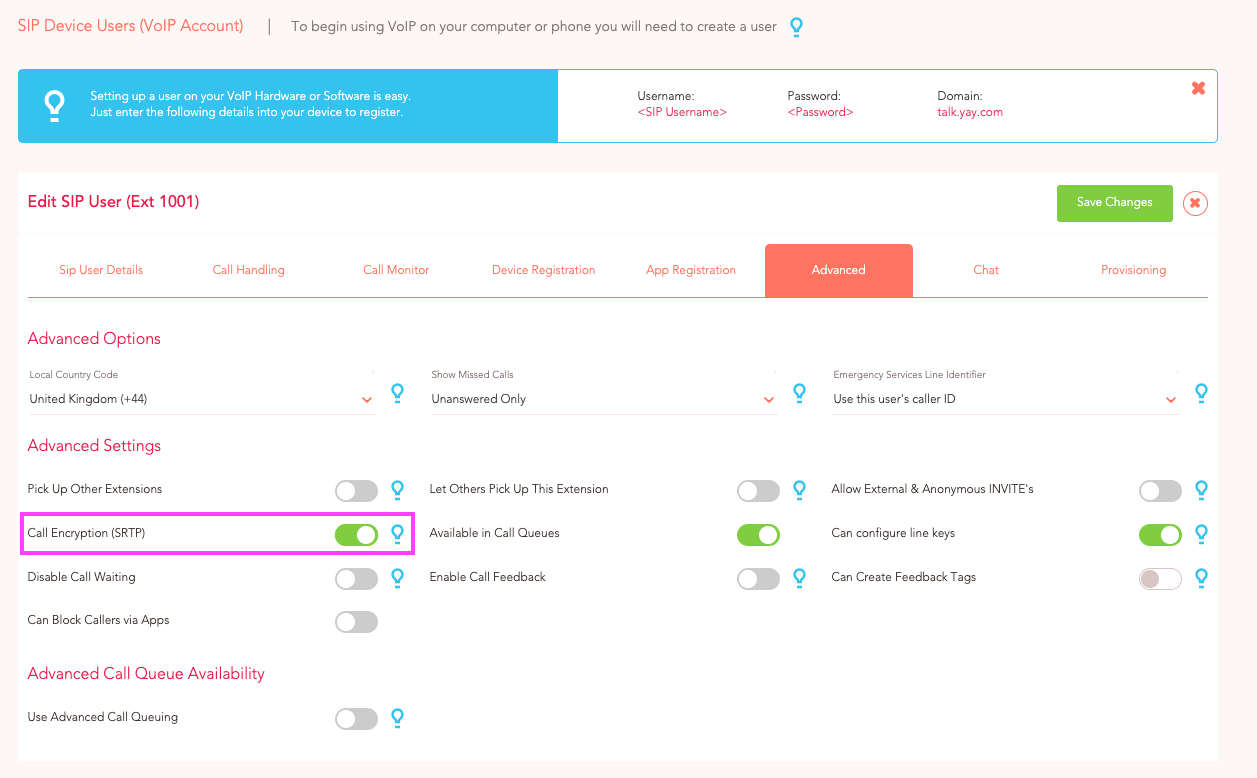
If left on you won’t be able to make or receive calls unless you also have Call Encryption turned on for the user in the Yay portal (as seen in the image below, located under the Advanced tab).
If you need any further help today, please don't hesitate to contact our friendly support team on 0330 122 6000 or by email!