How do I set Default & Distinctive Ringtones on Yealink?
The Yay platform currently supports distinctive ringtones for internal and external calls for Yealink deskphones.
This can be done through the addition of a couple of config lines added to a file which is applied to the device(s), which can all be done through the Yay portal.
There are four lines needed to set your internal and external ringtones, which are as follows:
distinctive_ring_tones.alert_info.1.text = Internal
distinctive_ring_tones.alert_info.1.ringer = x
distinctive_ring_tones.alert_info.2.text = External
distinctive_ring_tones.alert_info.2.ringer = x
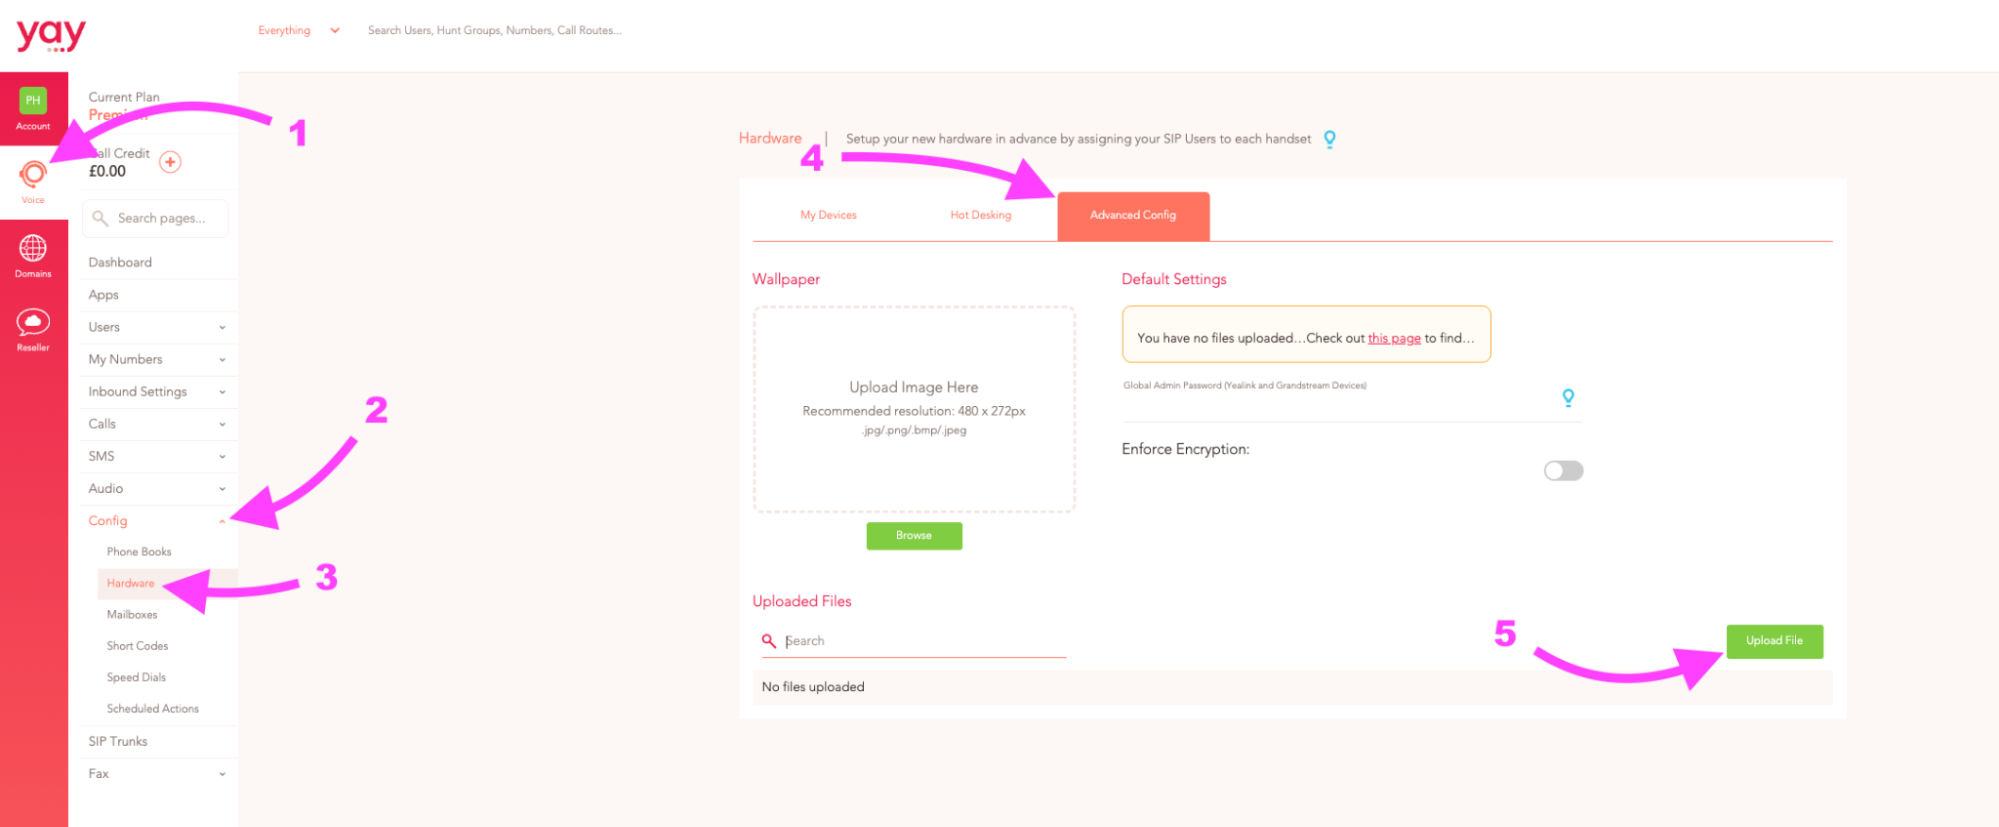
To add these config lines go to:
1. Voice
2. Config
3. Hardware
4. Advanced Config
5. Upload File
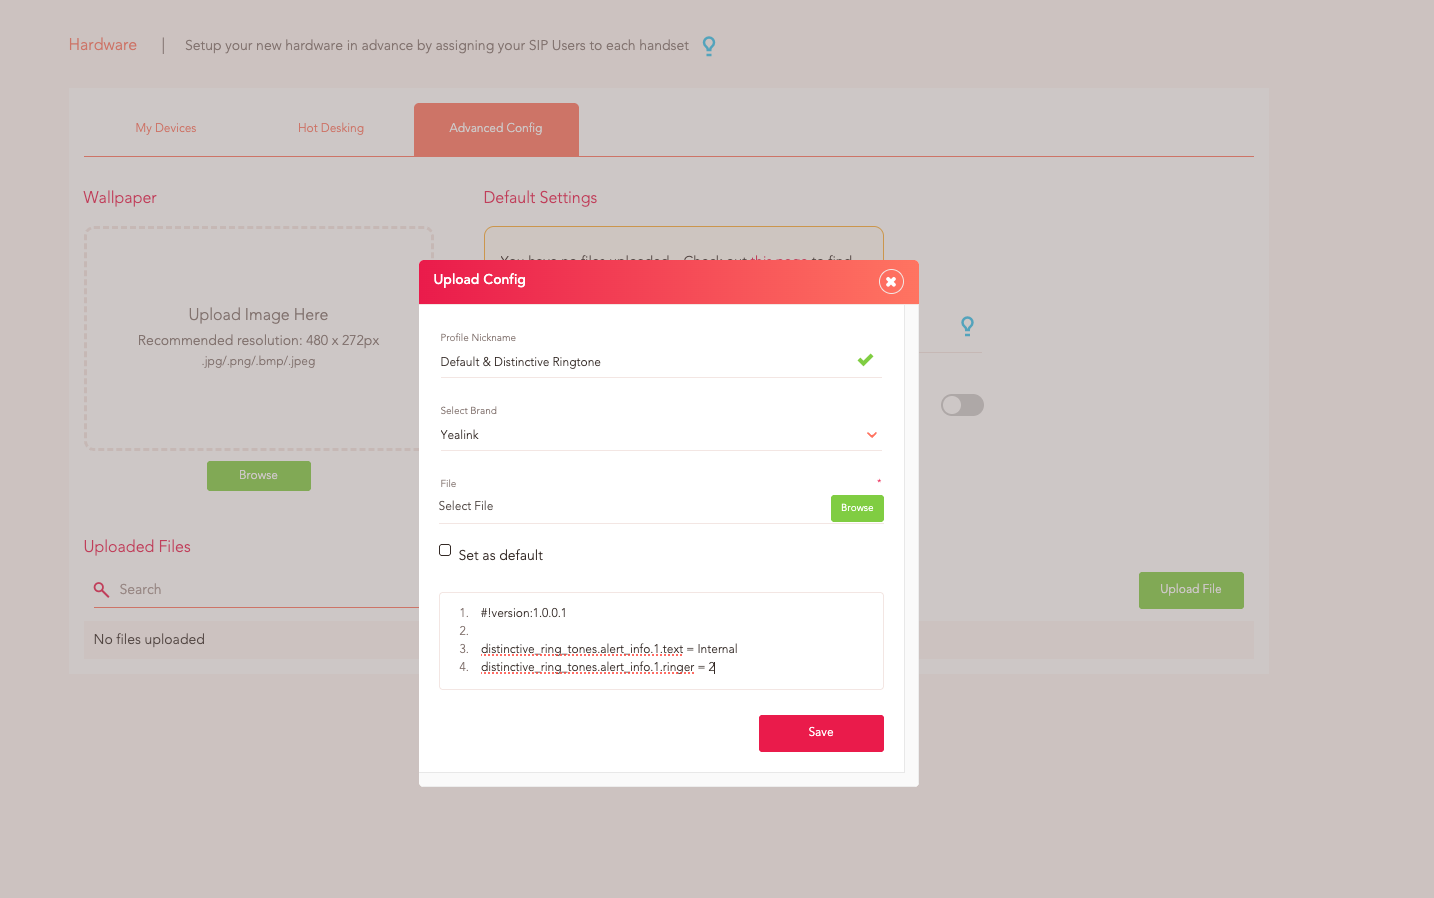
1. Profile Nickname is up to you!
2. The line in 1. is always #!version:1.0.0.1
3. The line in 2. is always left blank.
4. Any lines afterwards are the config lines you’d like to add. In this case, you’re adding config lines for a Distinctive Ringtone.
- Line 3. should be distinctive_ring_tones.alert_info.1.ringer = 3
- The ringer value, set to 3 in the example above, can be changed between 1-10 (more options available depending on model type) to use one of the default ringer sound files on the phone. By default Yay sets the normal ringtone to use ringer 1, so should be avoided as being used for the Internal ringtone.
5. Line 4. should be distinctive_ring_tones.alert_info.1.text = Internal
You can also change Internal to External depending on what you’d like.
6. You can choose whether you’d like to set this as Default.
7. Save
To change the normal ringtone of a Yealink device using its default sound files you can add the following config line:
phone_setting.ring_type = Ring[1-8]/Silent/Splash.wav
The value before .wav should be changed to your preferred option.
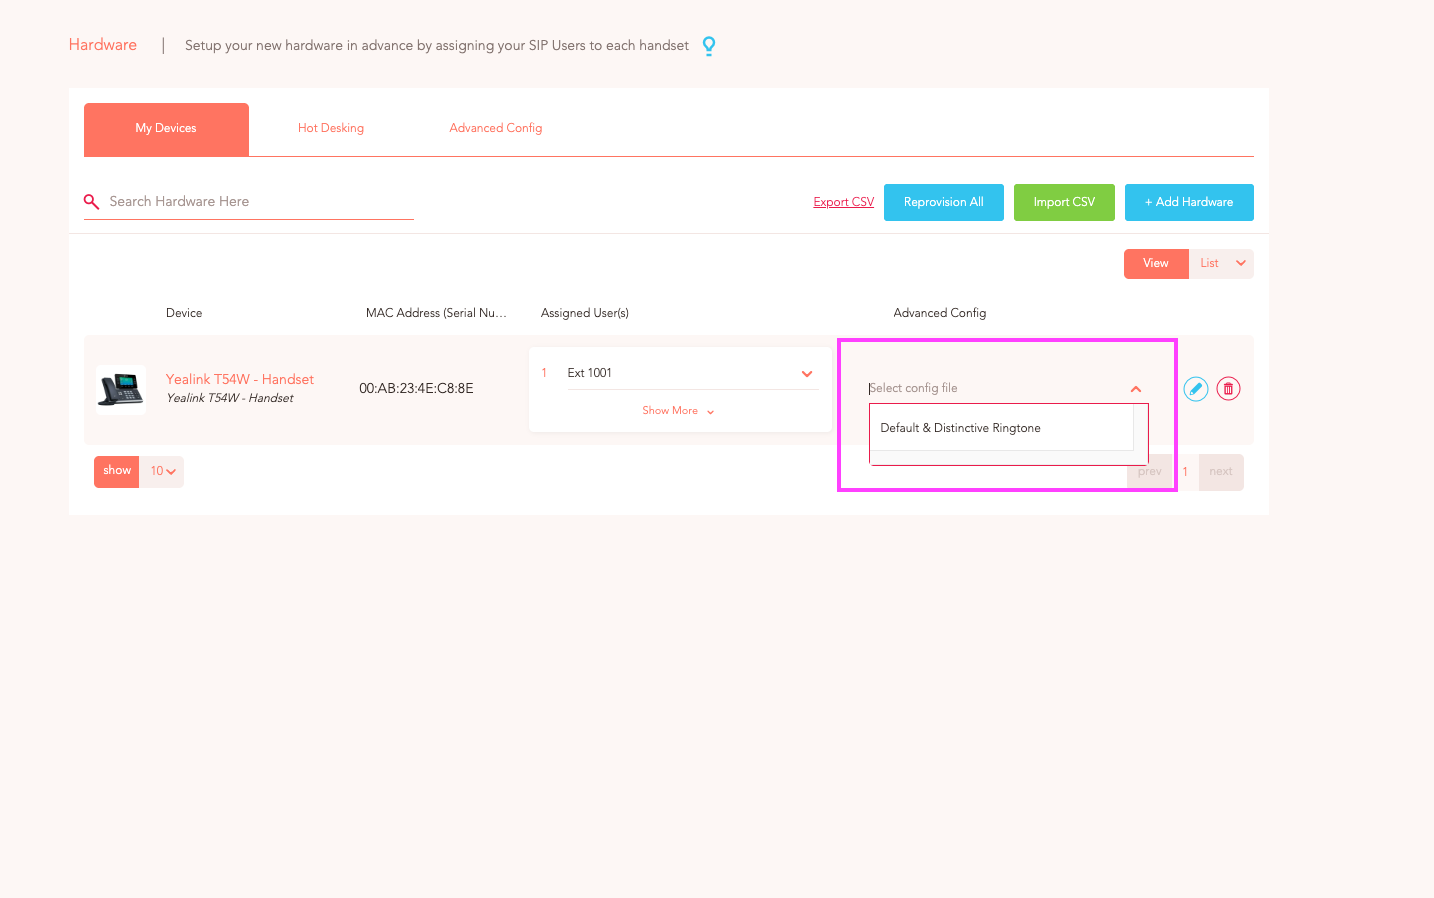
Now you just need to assign your config files to your Yealink device(s). To do this, go to:
1. Voice > Config > Hardware
2. Click the devices you'd like to assign the file to
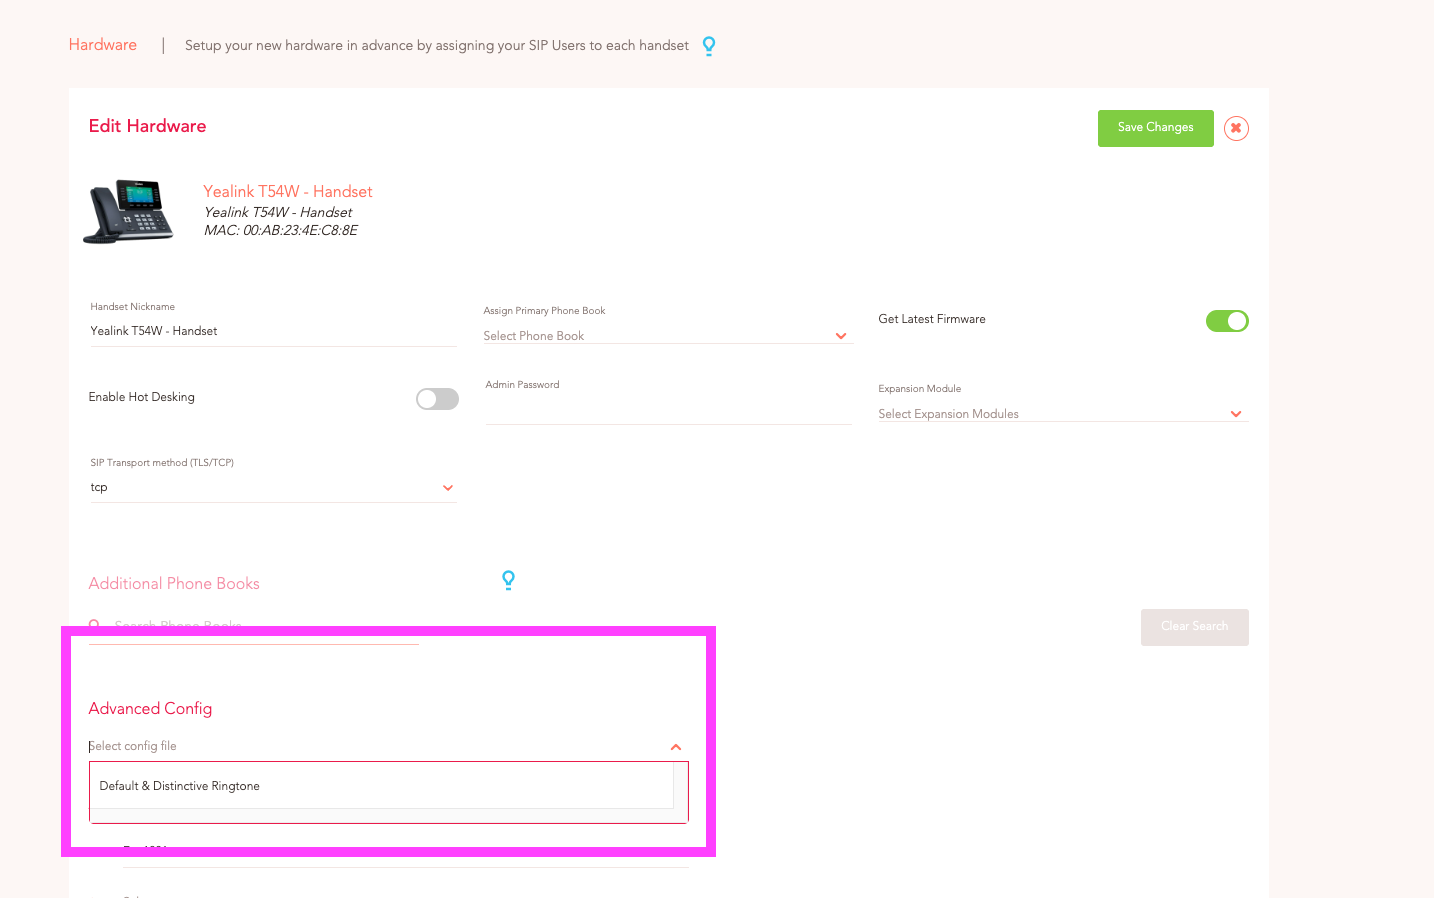
3. Under Advanced Config > Select config file
4. Choose the file you'd like to assign
5. Save Changes