How do I set up Advanced Config for Grandstream Devices?
Setting advanced config for your Grandstreams is a great way to customise your phone’s settings in bulk!
This can be done through the addition of P values added to a file which is applied to the device(s), which can all be done through the Yay portal.
Each Grandstream device has its own set of P values for different settings.
To find the P values for your Grandstream, you can directly download the config templates from Grandstream here:
https://content.grandstream.com/hubfs/Grandstream_Feb_2021/Zip%20File/config-template.zip
Alternatively, you can go to the Grandstream website here and download it from there.
Open the file and go to config-templates.
This will open a folder with all Grandstream model ranges. Click on your model and you will find the P value for every setting of the phone(s). If you can’t find a setting, please check in the change log folder.
If you’d like to search for a specific setting, press Cmd + F, or Ctrl + F depending on your device, and there you can search for the specific setting.
Once you’ve found that setting, you should see a P value underneath it.

This example is the P value for Direct IP Calling for a GXP2160. The 4th line is the P value that you will enter into the Yay portal.
In this case, the P value is P1310 = 0
In all P values, 0 means No, and 1 means Yes.
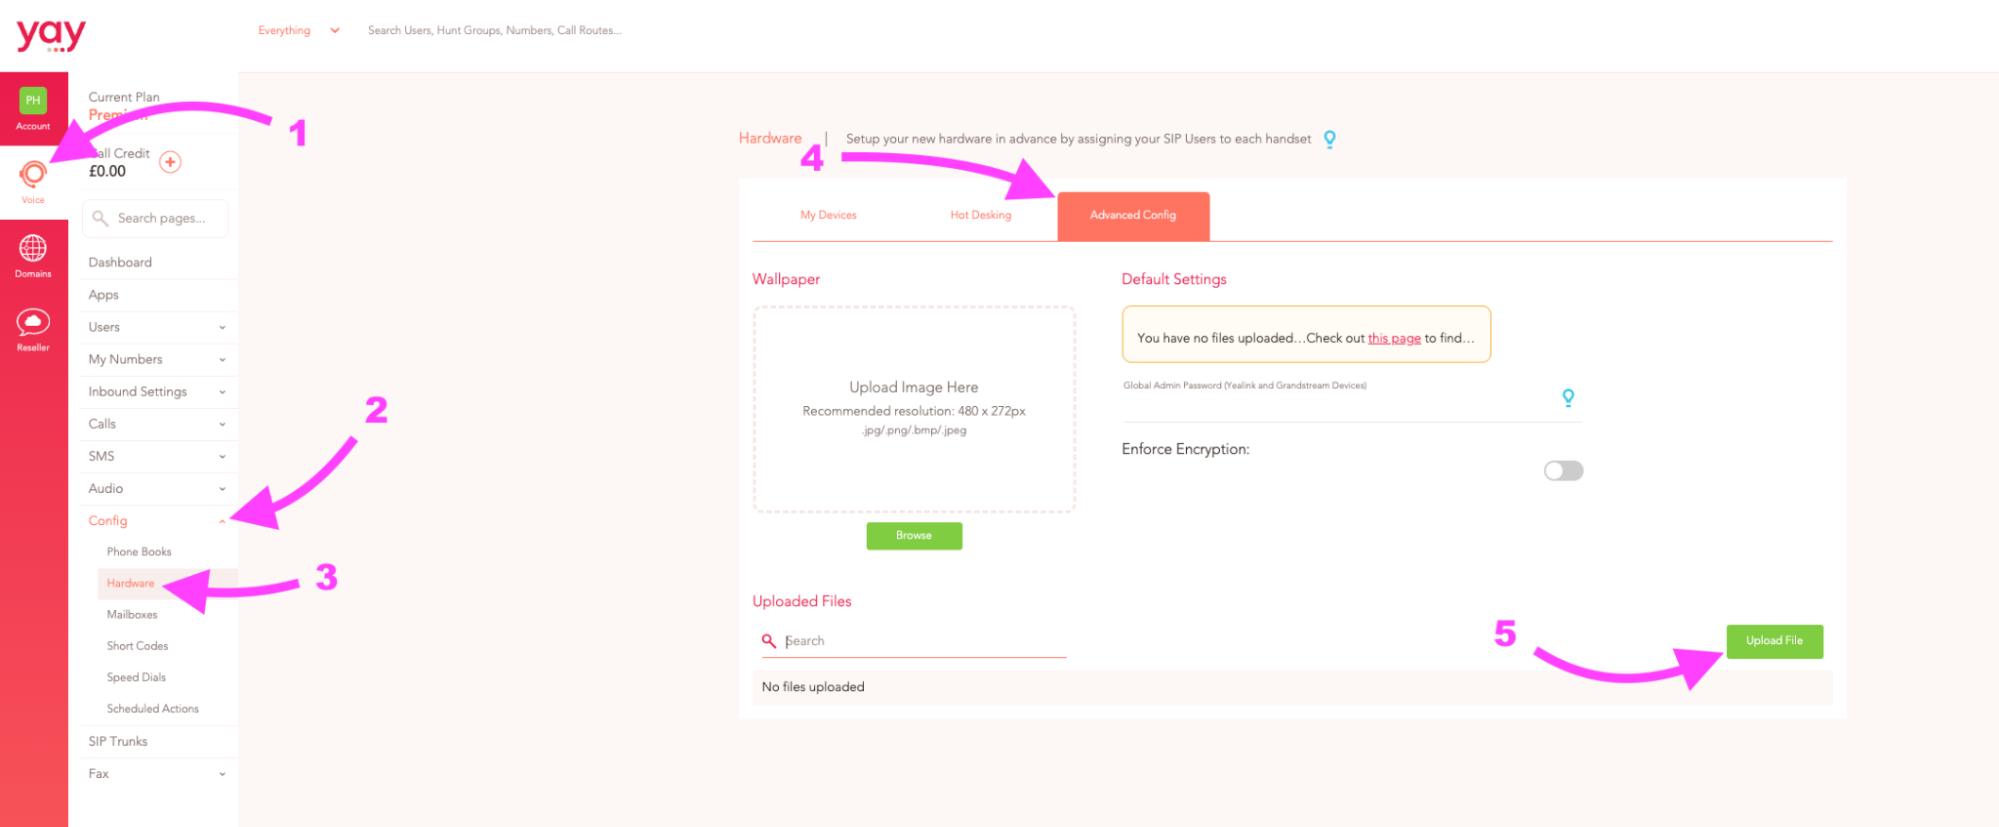
Once you’ve found all the P values you’d like to add, log into your Yay dashboard and go to:
1. Voice
2. Config
3. Hardware
4. Advanced Config
5. Upload File
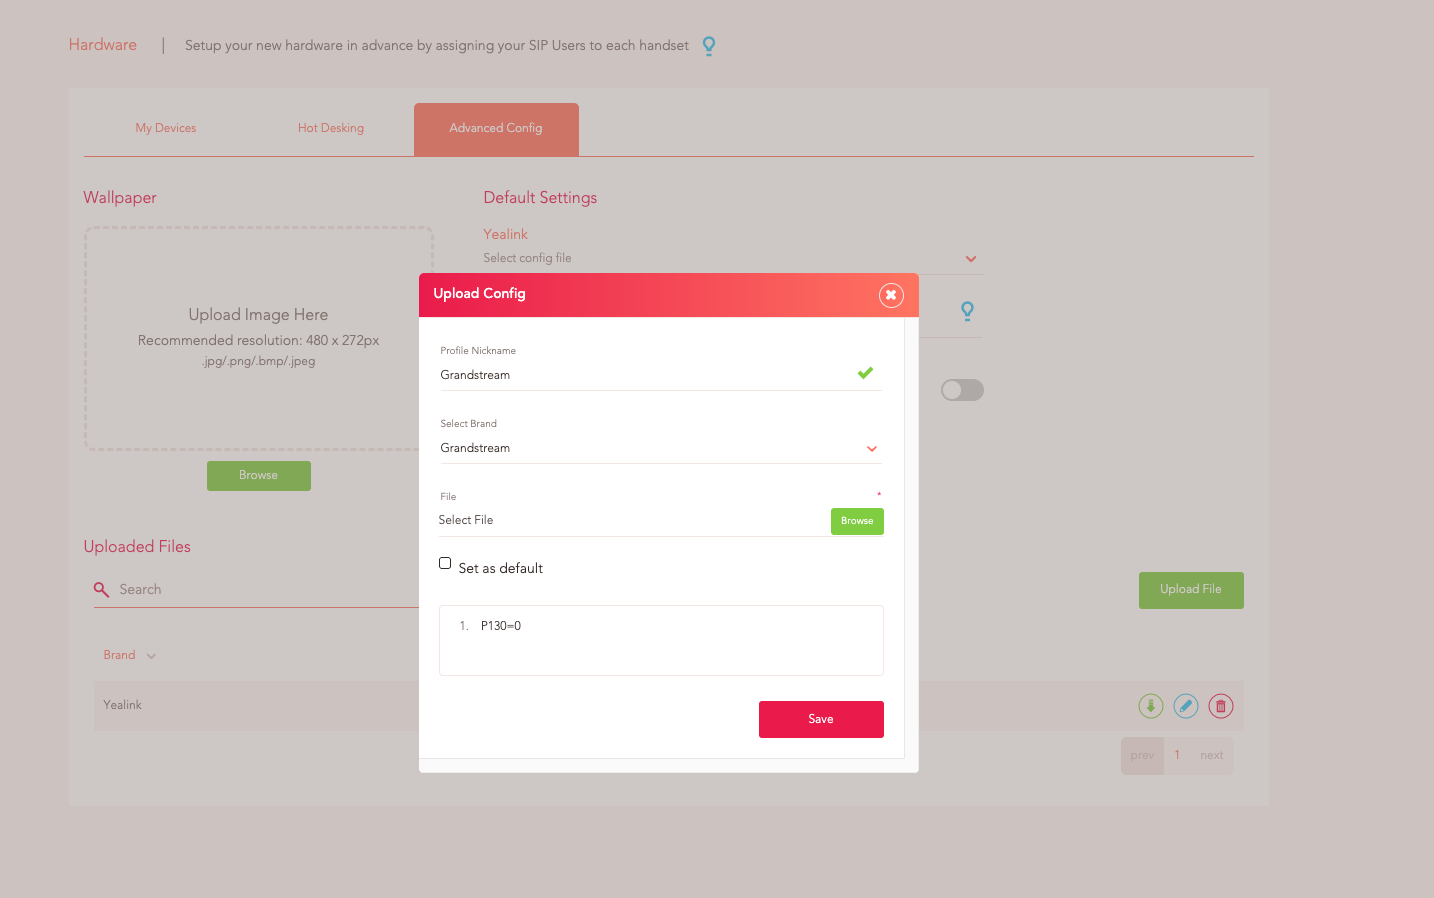
1. Profile Nickname is up to you!
2. Enter your P value exactly how it is in the config template.
3. Put each value on a new line.
4. Press Save.
Now you just need to assign the file to your Grandstream device(s). To do this, go to:
1. Voice > Config > Hardware
2. Click the device you’d like to assign the file to
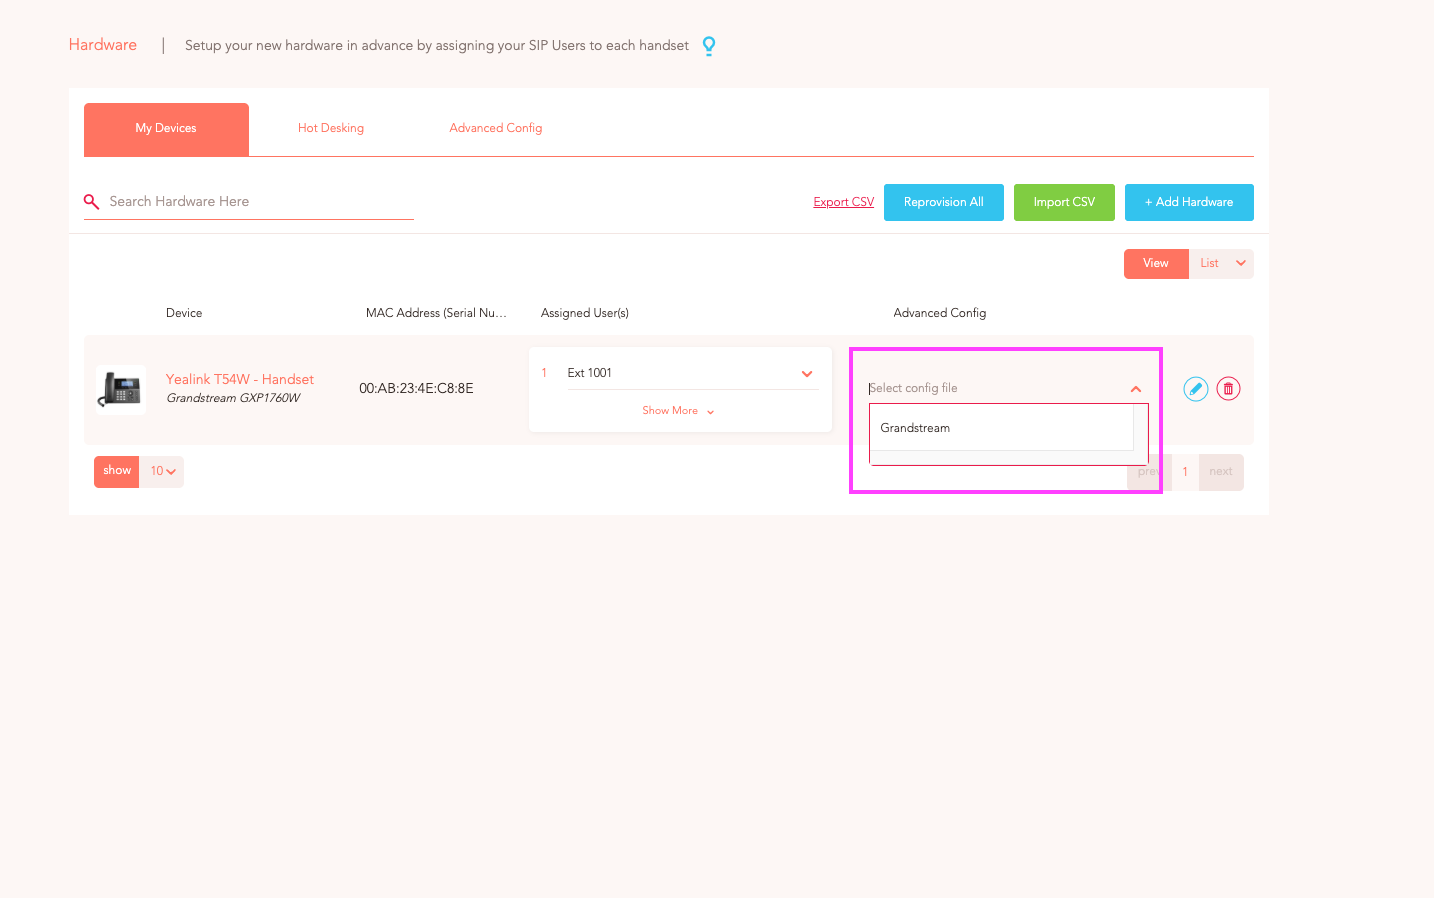
3. Under Advanced Config > Select config file
4. Choose the file you’d like to assign
5. Save Changes