How do I create a phone book on Yay?
You can create Phone Books in the Yay.com Admin Dashboard and determine which Users can have access to the phone books that you create.
To create a Phone Book…
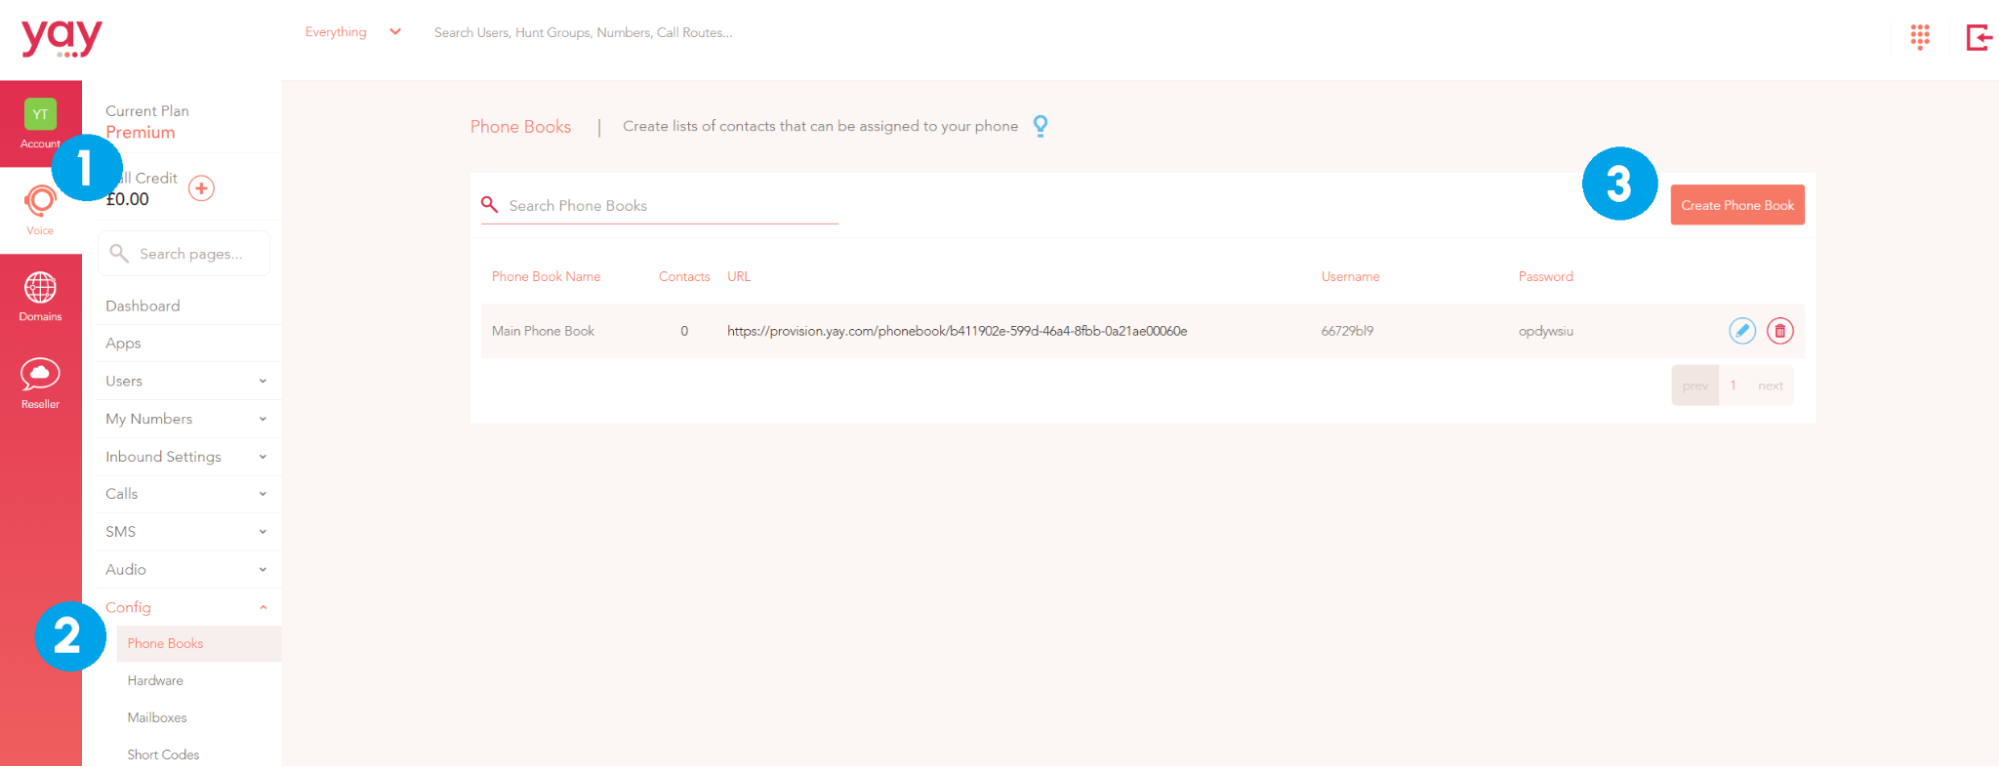
1. Click on the Voice option on the left of the Dashboard.
2. Then click Config from the menu and then select Phone Books
3. Click the Create Phone Book button on the right.
Give your Phone Book a Name and then generate a secure Username and Password for secure Phone Book sharing and deskphone access via a URL.
You can enter the URL and authentication details for the Phone Book in the GUI of your deskphone so that you can have multiple Phone Books on your physical device.
The URL is automatically generated when you click the Save Changes button in the top right-hand corner.

To add Contacts to your Phone Book, click on the blue Edit button (pencil icon), to the right of your newly generated Phone Book.

Click on the Add Contact button to add individual contacts, or use the Import Contacts option to add multiple contacts by uploading a CSV file. Clicking the Export Contacts button will provide a CSV template.

When creating a single contact, use the Add Phone Number button to add a contact telephone number for your contact. Use the Label drop-down box to set the number type (main, work, home, etc).
You can also use the Add Email Address button to add an email address for your contact.
You can add multiple telephone numbers and email addresses for the same Contact record and differentiate by setting a Label.
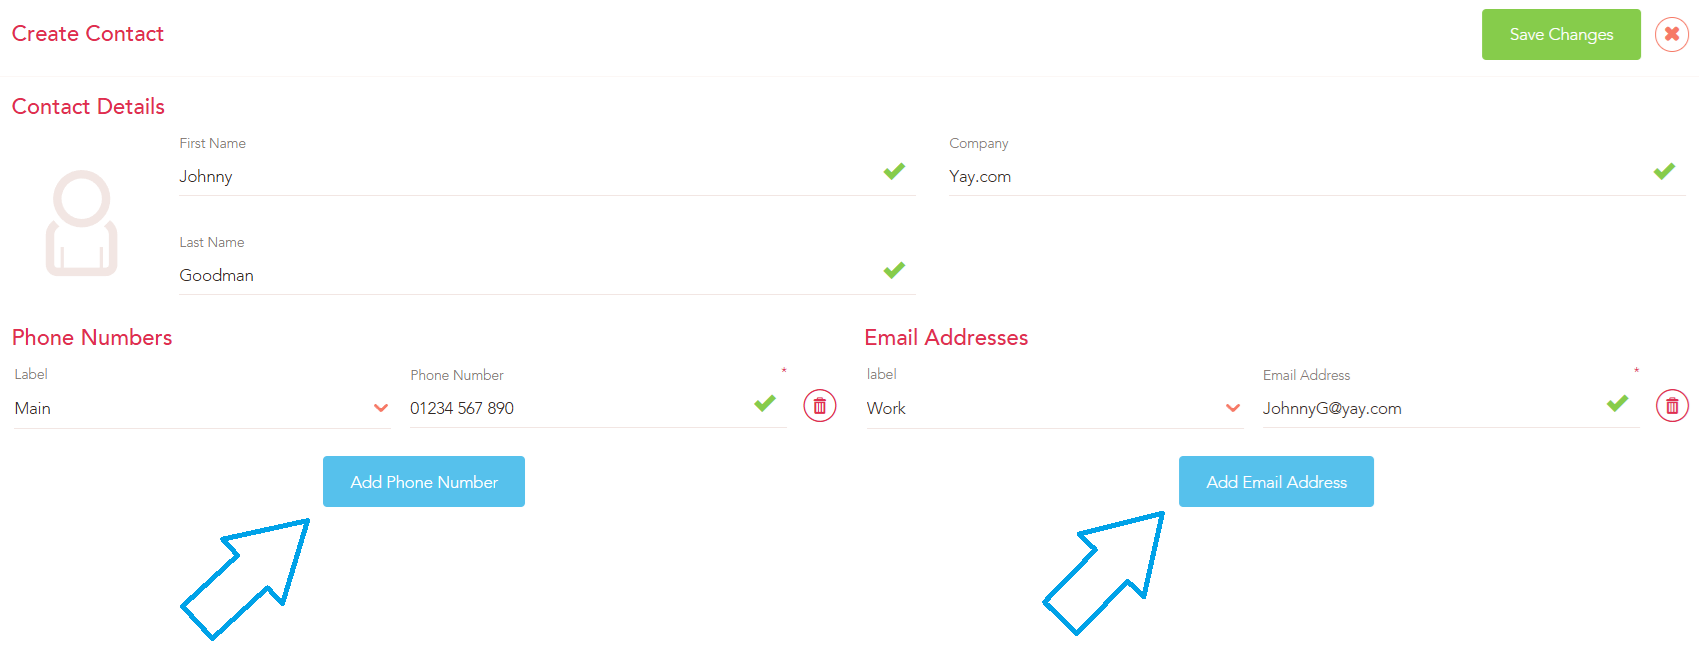
Click the Save Changes button at the top to save the Contact to your Phone Book.