How to set up a Zendesk integration
1. Generate a Zendesk API token
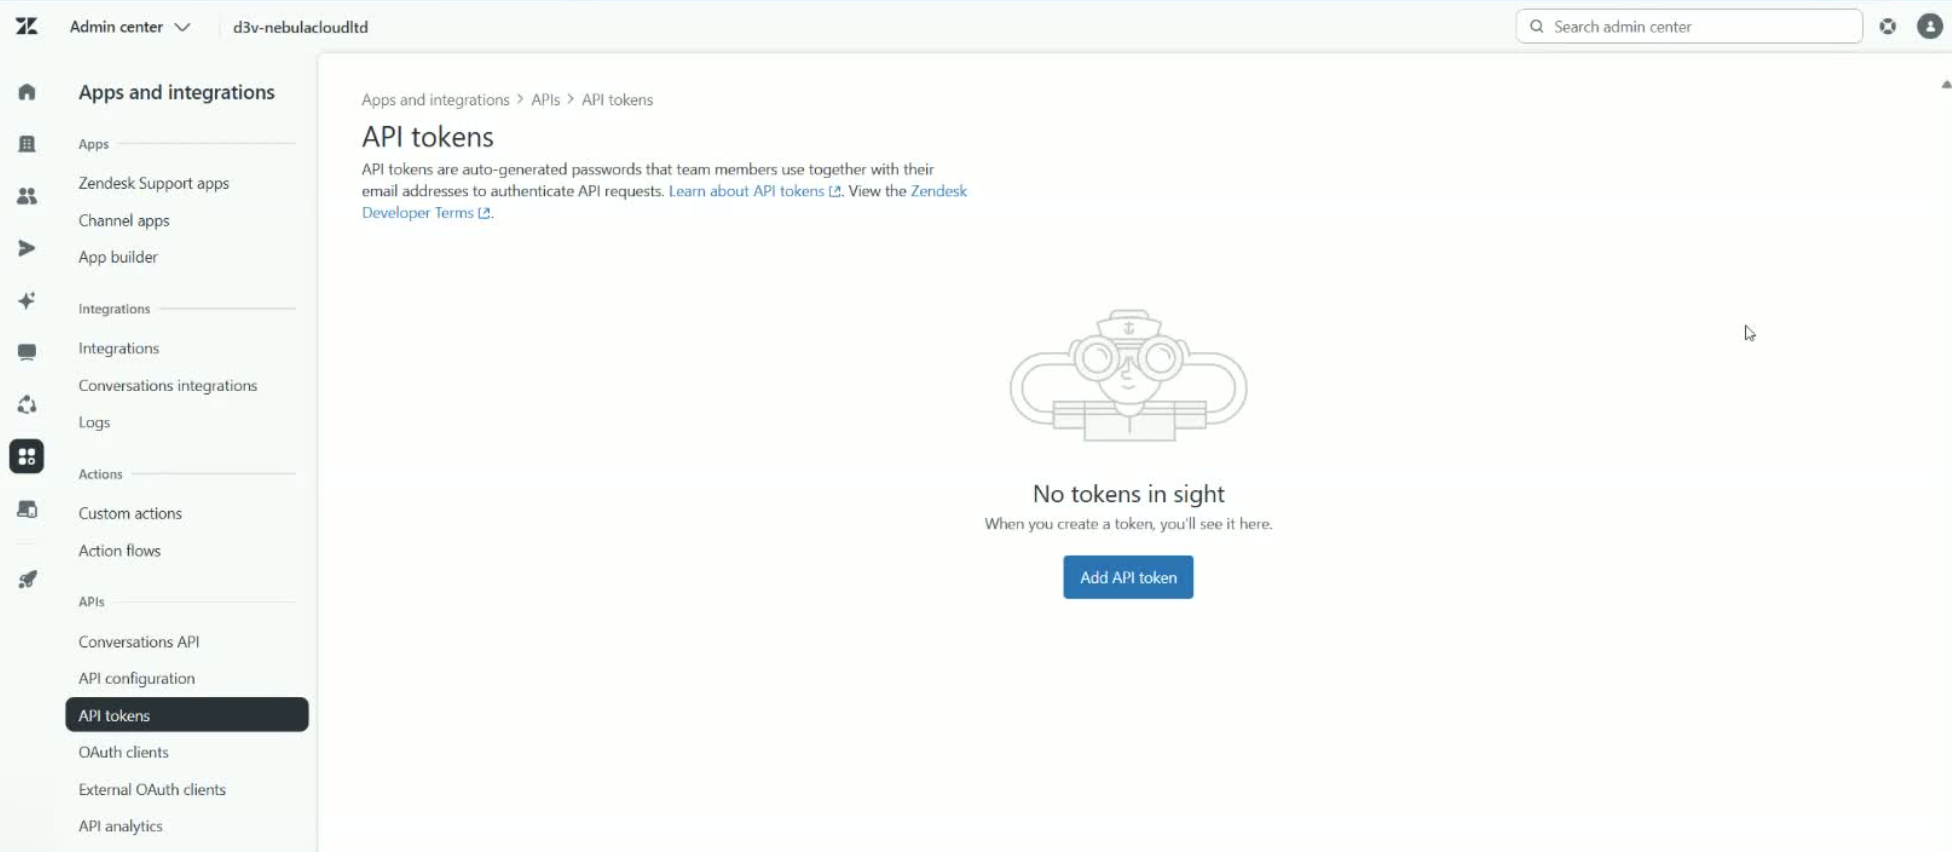
In Zendesk, go to Admin Centre
Navigate to Apps and Integrations > API Tokens.
Click Add API Token.
Give the token any name you want and click Save.
Copy the token immediately — you won’t be able to view it again.
2. Start the Zendesk integration in Yay.com
Open your Yay.com dashboard.
Go to Account > Integrations > Install Integrations > Select Zendesk.
Enter the email address for the Zendesk admin user.
Paste in the API key you generated in Zendesk.
Enter your Zendesk account URL.
Choose whether to add a new phone book or select an existing phone book.
Click Complete Installation.
The integration will begin syncing in the background.
3. Map Zendesk users to SIP Users
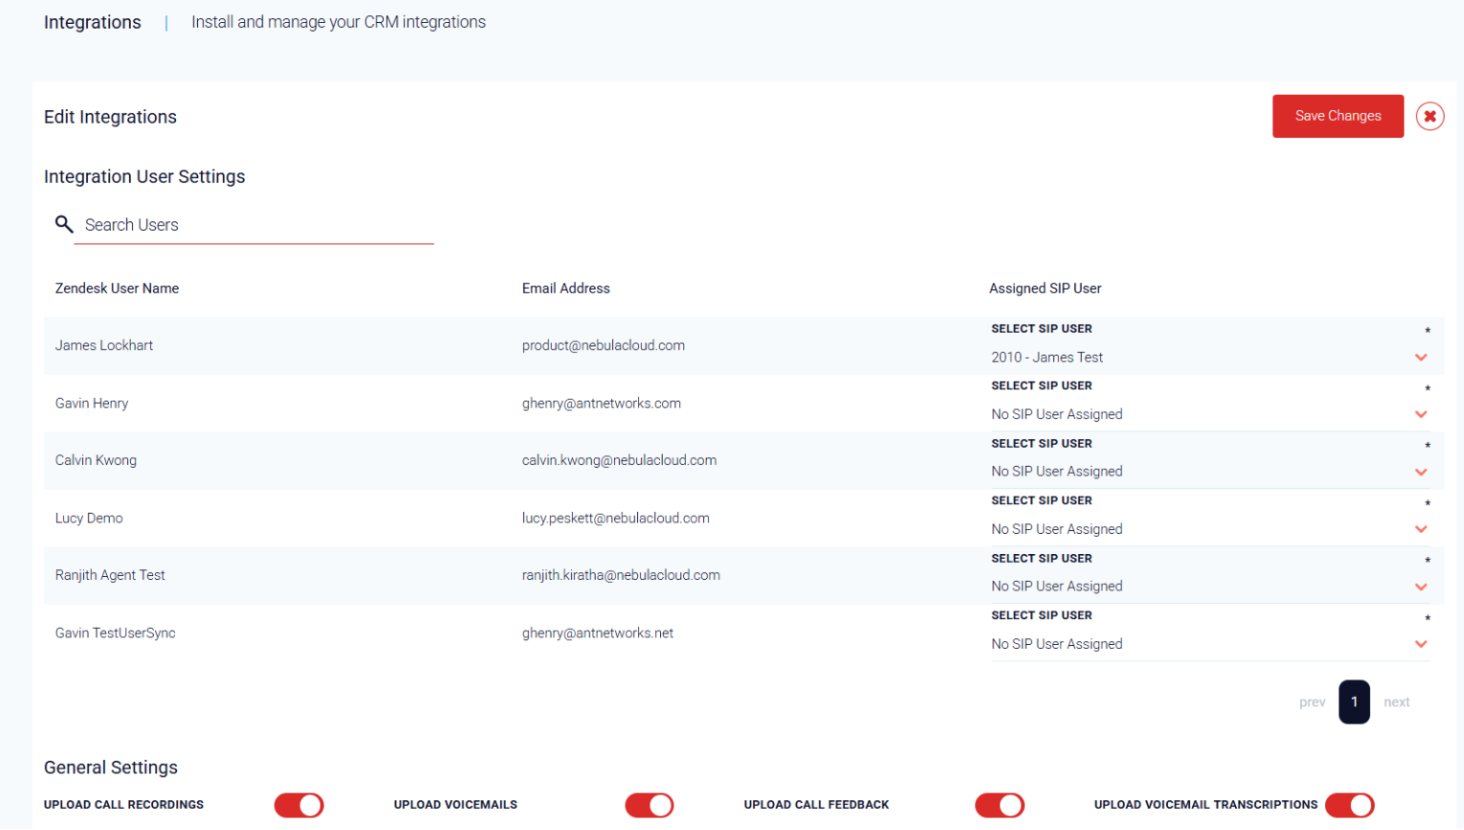
Review the list of Zendesk users shown in the integration setup.
Assign a SIP user to each required Zendesk user.
Adjust any other settings you require
Click Save when finished.
4. Configure Zendesk screen pop behavior
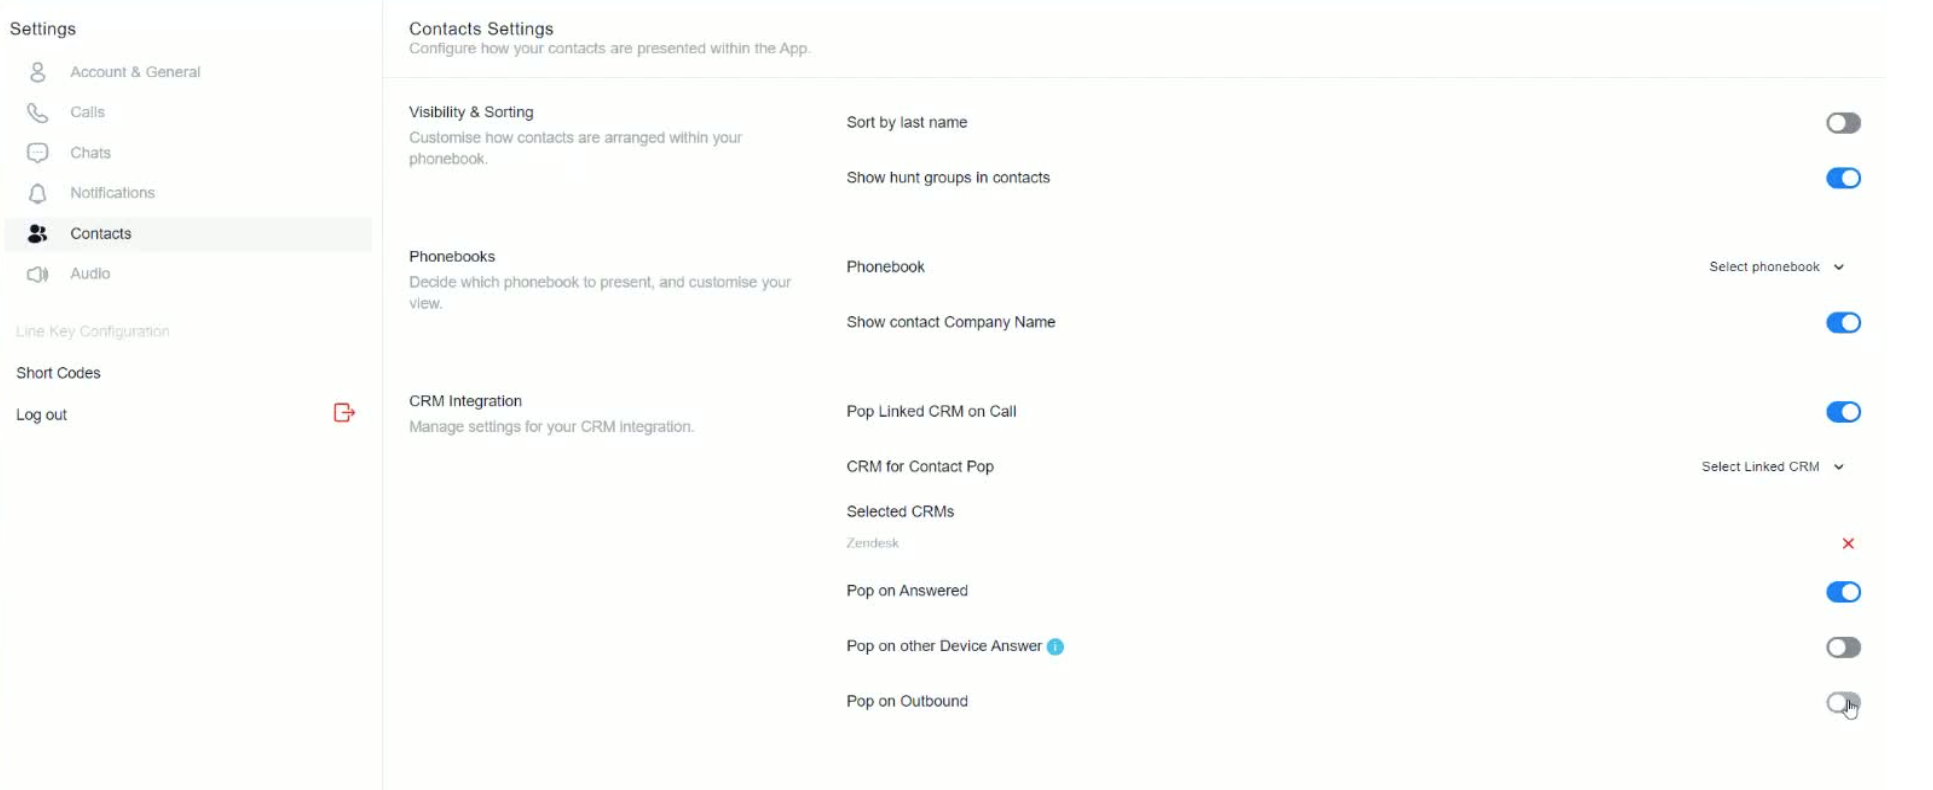
Go to Settings > Contacts > CRM Integrations.
Select Zendesk from the CRM list.
Choose when the CRM should pop:
- If the screen should pop on answer, turn this on - otherwise the screen will pop when ringing begins
- Decide whether the pop should also happen if the call is answered on another device, such as a desk phone.
- Choose whether to enable it for outbound calls.
5. Zendesk ticket creation
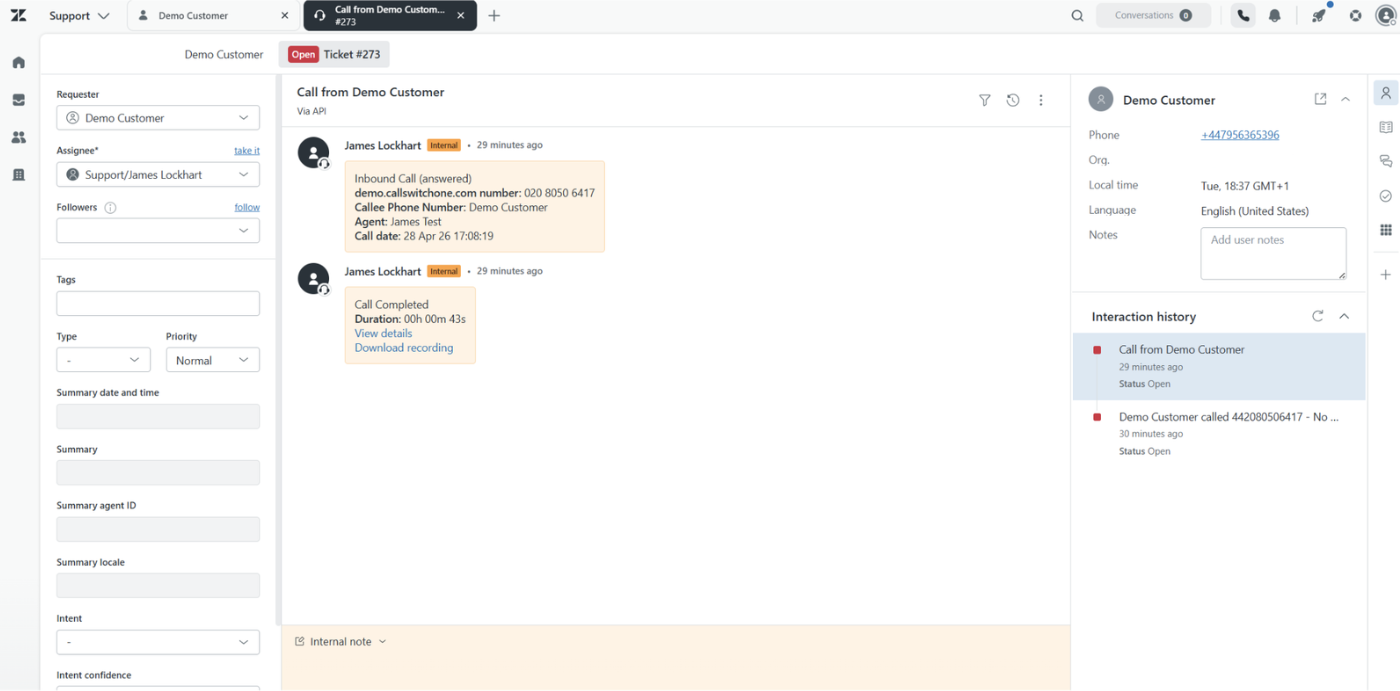
When a recognized Zendesk contact calls, the page for that contact will pop. Then a ticket is created and linked to the call. (This may take several minutes to be visible)
- Note: We are unable to pop records or create tickets for unrecognised numbers, if a number is recognised for multiple contacts we also cannot trigger a screen pop or automatically create a ticket.
After the call ends, Zendesk receives additional call details for internal use. This will not be displayed to the contact.
Depending on what options have been configured, the ticket can include:
- A link to the Yay.com dashboard call history page
- A link to the Call Recording if one exists
- Call Duration
- Agent name
- Date and Time of the call
- Call Feedback
- Call Tags
- Call Notes
- Voicemail Recording (for missed calls)
- Voicemail Transcription
Existing tickets for the same customer can also be merged with the new call information.
If you have any questions, please don't hesistate to reach out to our friendly team on 0330 122 6000, or email help@yay.com.